DataGrip Installation & Connection
AWS CLI Installation
Before we can use DataGrip, we have to first install the AWS Command Line Interface that will store your IAM User credentials
-
Generate your access keys from the
Security Credentialstab in your AWS terminal and save the csv file created -
Download and install AWS CLI to your system.
- You can test if your system recognizes the install with the command "aws --version"
-
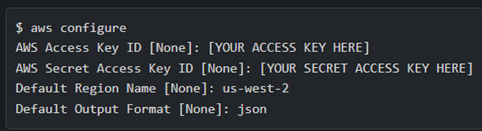
Open your powershell or terminal and run the command "aws configure"
-
Replicate the following output:
-
Open the
configandcredentialsfiles and change the name of your user profile from default
DataGrip Installation
- Download DataGrip
Athena Connection
-
Download the JDBC Driver from AWS. This allows you to link your IDE to the S3 console
- Remember the location of the .jar file downloaded
- Ensure its the AWS SDK driver
-
Open your Database Tool Window and select Data Source Properties and it should open a list, at the bottom of the list is an option
Driver, click on this.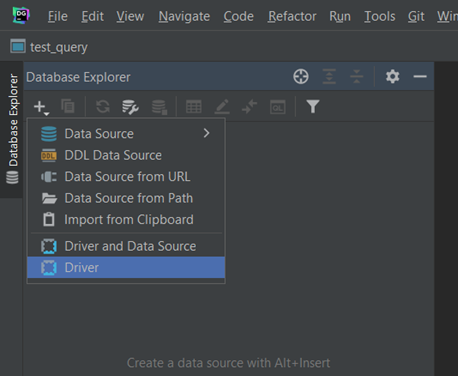
-
Rename the driver to 'Athena' or 'AWS Athena'
-
In the section called Driver Files, import the JDBC driver you downloaded earlier (.jar file). In the class section right above select the driver
com.simba.athena.jdbc.Driverand click ok.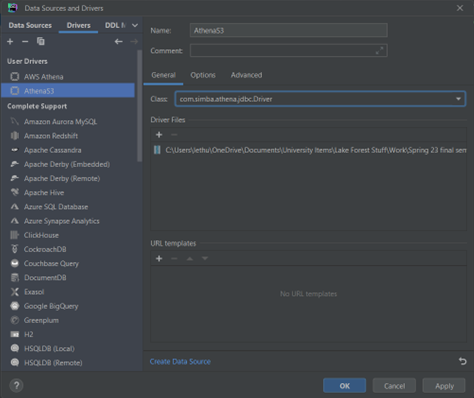
-
Open Data Source Properties again and under Data Source, select the driver you just created
-
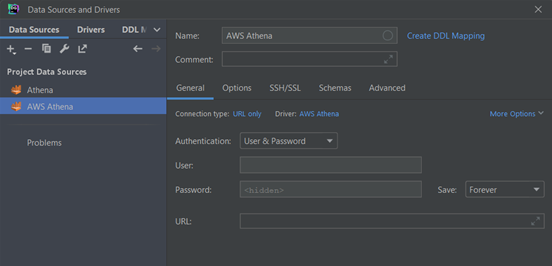
In the General tab:
- Change Driver to
Athena - Change Connection Type to
default - Change Authentication to
AWS Profile. - In the User field input the name of the CLI profile you created
- In the Region field input
us-west-2 - In the URL field input
jdbc:awsathena://AwsRegion=us-west-2
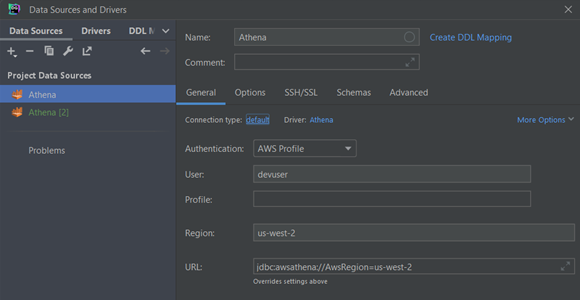
- Change Driver to
-
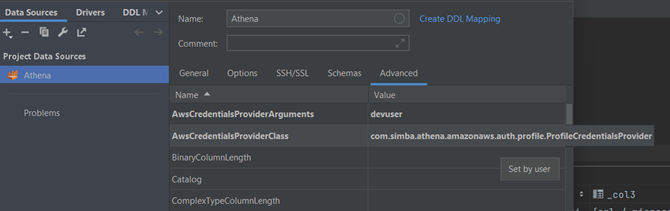
In the Advanced tab:
- In AwsCredentialsProviderArguments input CLI profile name
- In AwsCredentialsProviderClass input
com.simba.athena.amazonaws.auth.profile.ProfileCredentialsProvider - In S3OutputLocation input
s3://workhelix-rawdata/ - Click Test Connection