PyCharm Remote Development Guide
Prerequisites:
- Have an AWS account, save to your password manager your account Access Key and Secret Key
- *Install Git onto your computer. Ensure Git installed properly by typing
gitinto your terminal*
Homebrew
- Install Homebrew on your local computer
- Install AWS:
brew install awscli
PyCharm Terminal
- Download PyCharm Professional, activate it
- Install AWS toolkit from marketplace
- To ensure you’ve installed correctly, type
awsin your terminal, you should get a response -
type
aws configureinto terminal and insert your access key, secret key, region name:us-west-2, default output format:json
If successful, you should see something like the following on bottom right of IDE:

Docker
- Download Docker Desktop
-
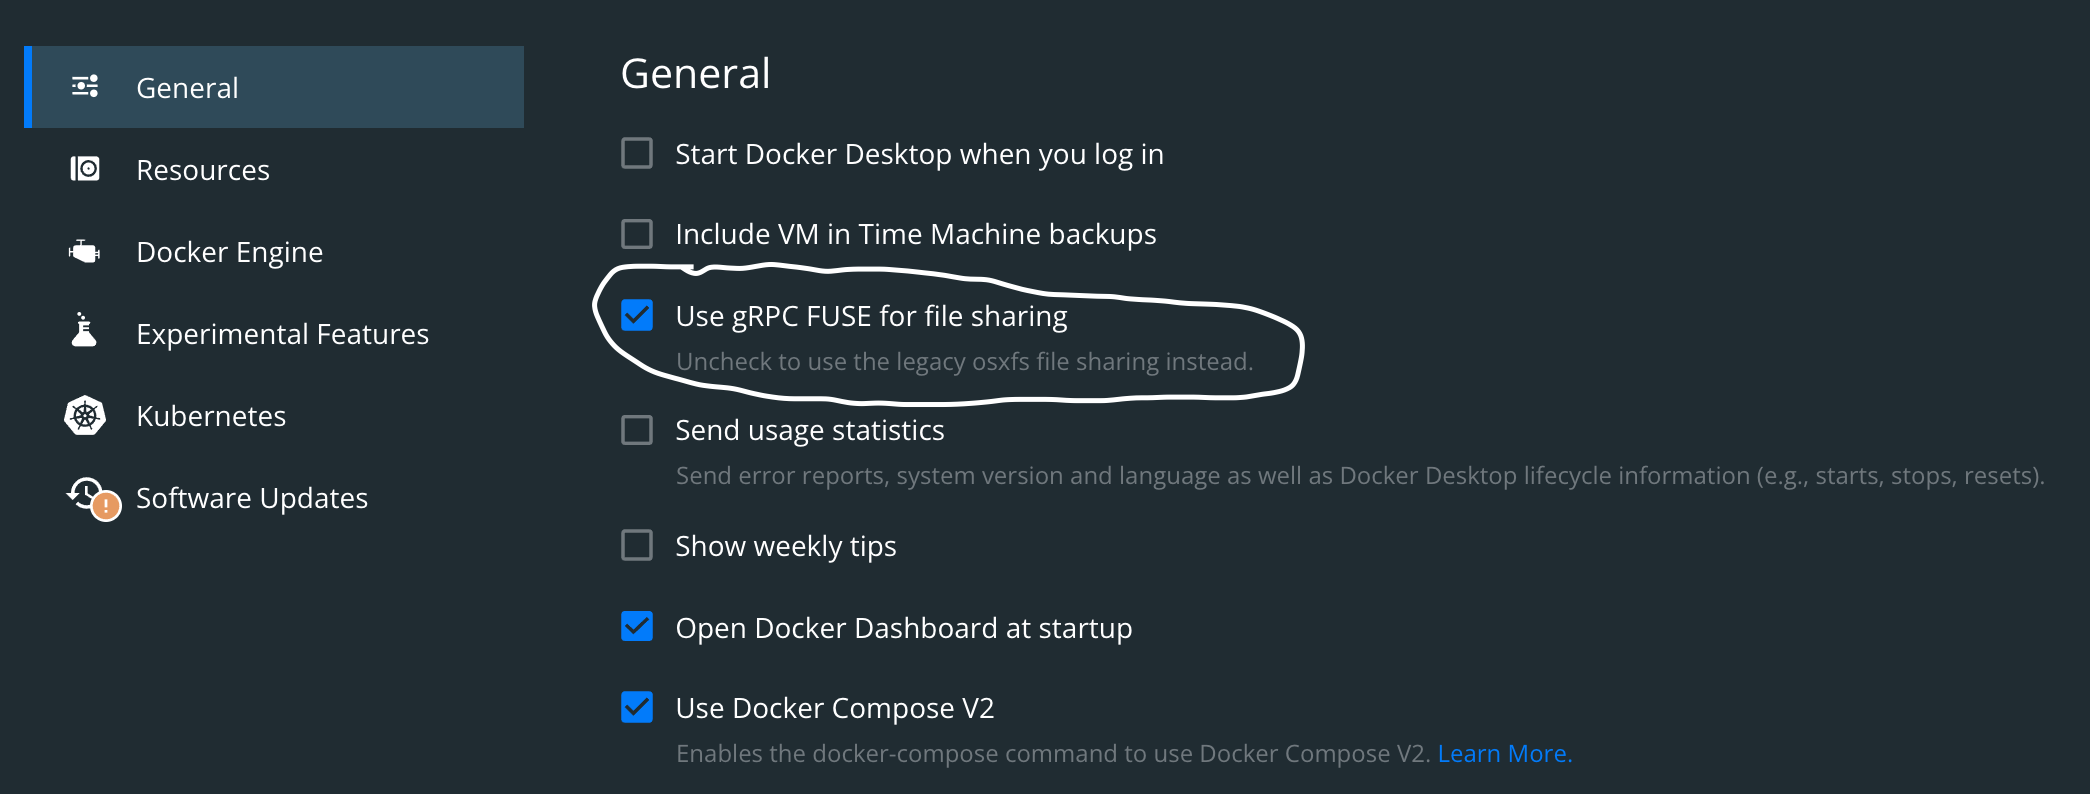
Go to settings, ensure file sharing is checked.

-
Ensure Docker installed properly by typing
dockerinto your terminal.
Serverless Application Model (SAM)
Install the SAM CLI by entering the following into your terminal:
brew tap aws/tapbrew install aws-sam-cli- Verify the installation:
sam --version - Copy the output of
which sam, you will use this in the next section.
Starting a Project
-
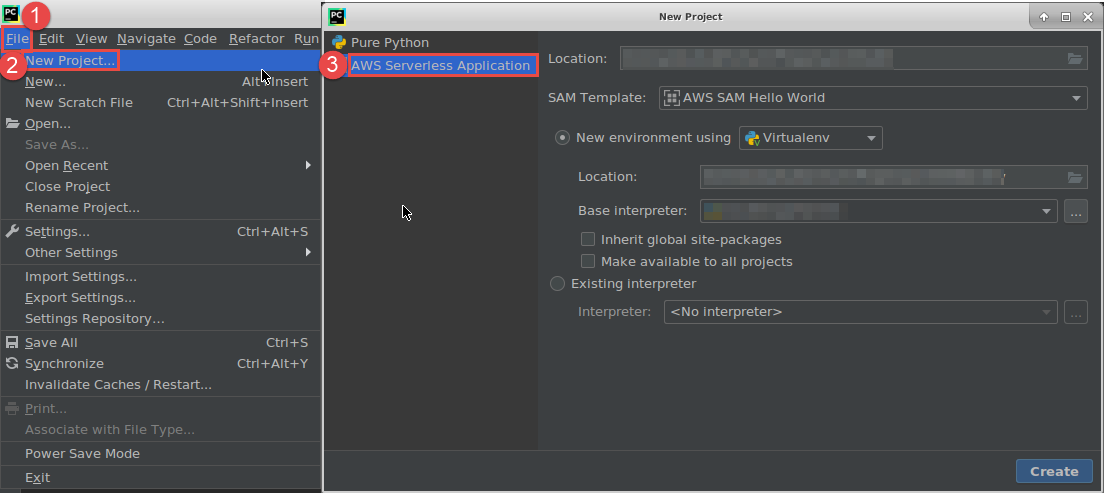
Go to File → New Project → AWS Serverless Application

-
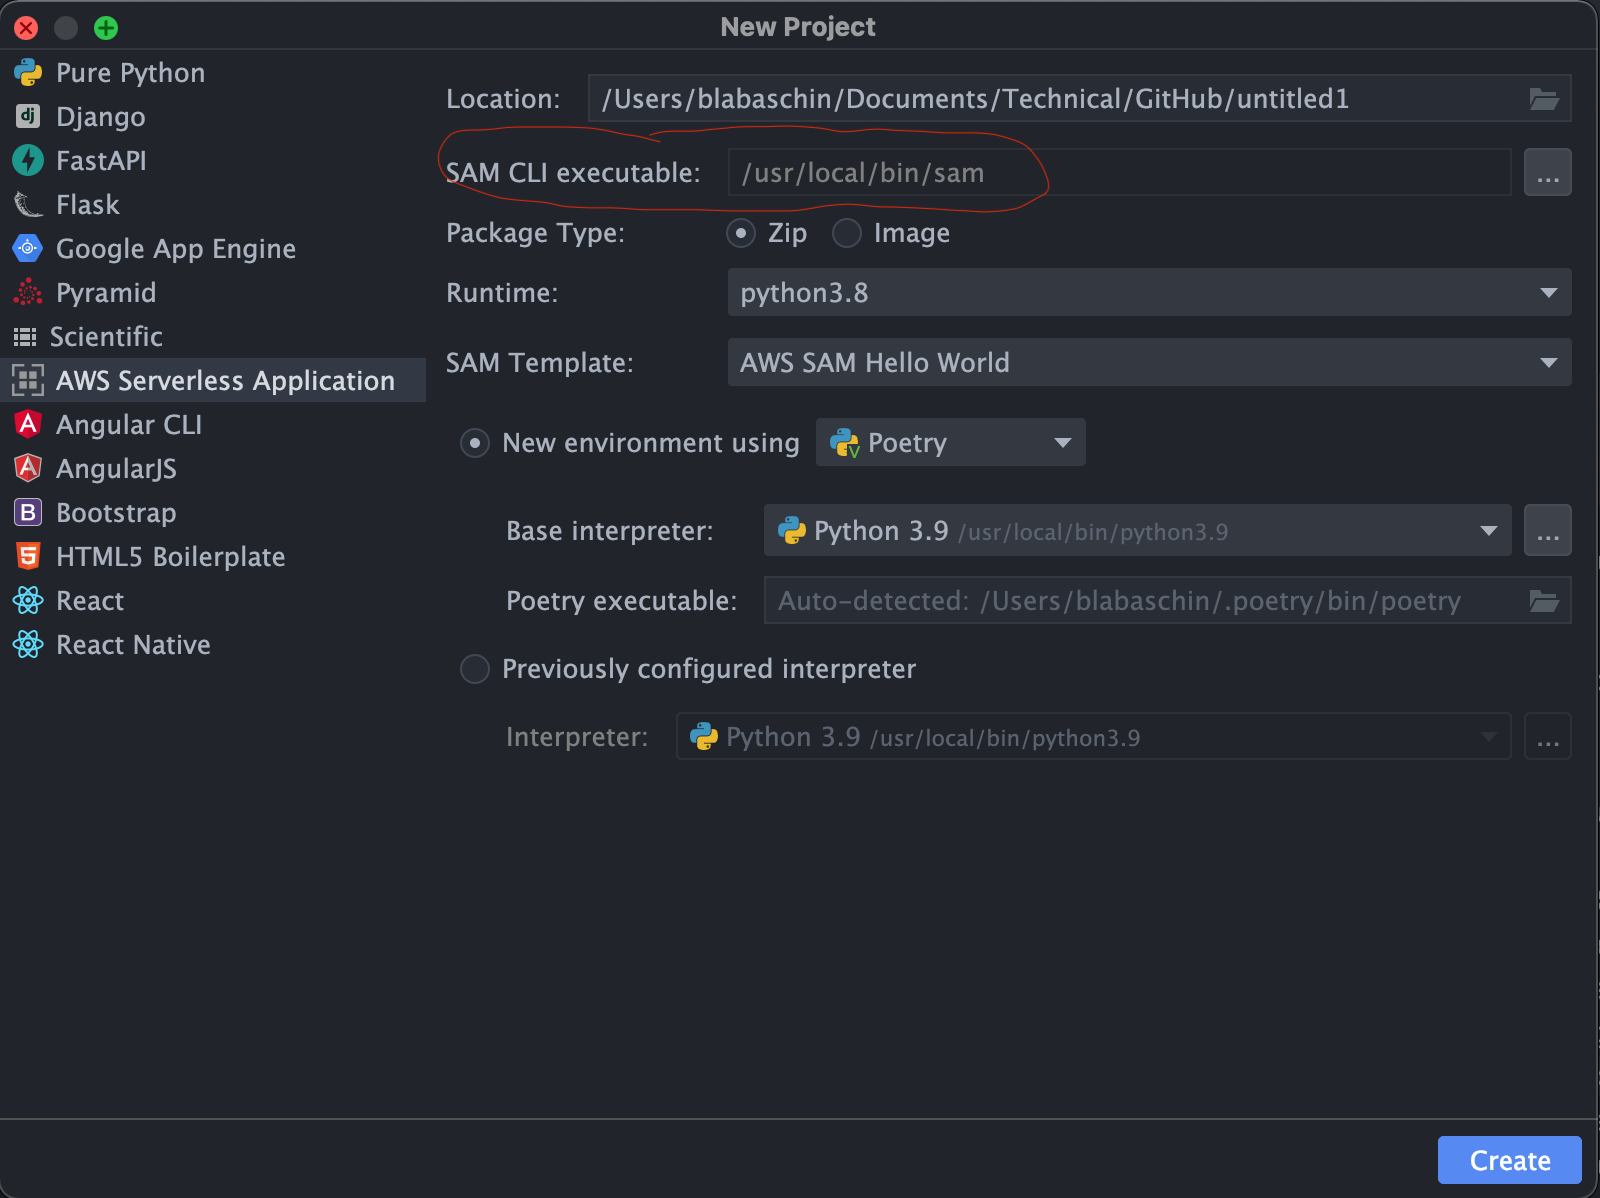
Paste the results of
which samto theSAM CLI executableline
-
Select
createafter the rest of your settings are to your liking.